Example Copper Roofing Projects in Round Rock

Seven copper jobs, from a single chimney to a whole roof, each traced from the first survey to the last seam with the house, the owners’ reason, the work itself and a rough price.

Copper roofs on two small front dormers

Example project
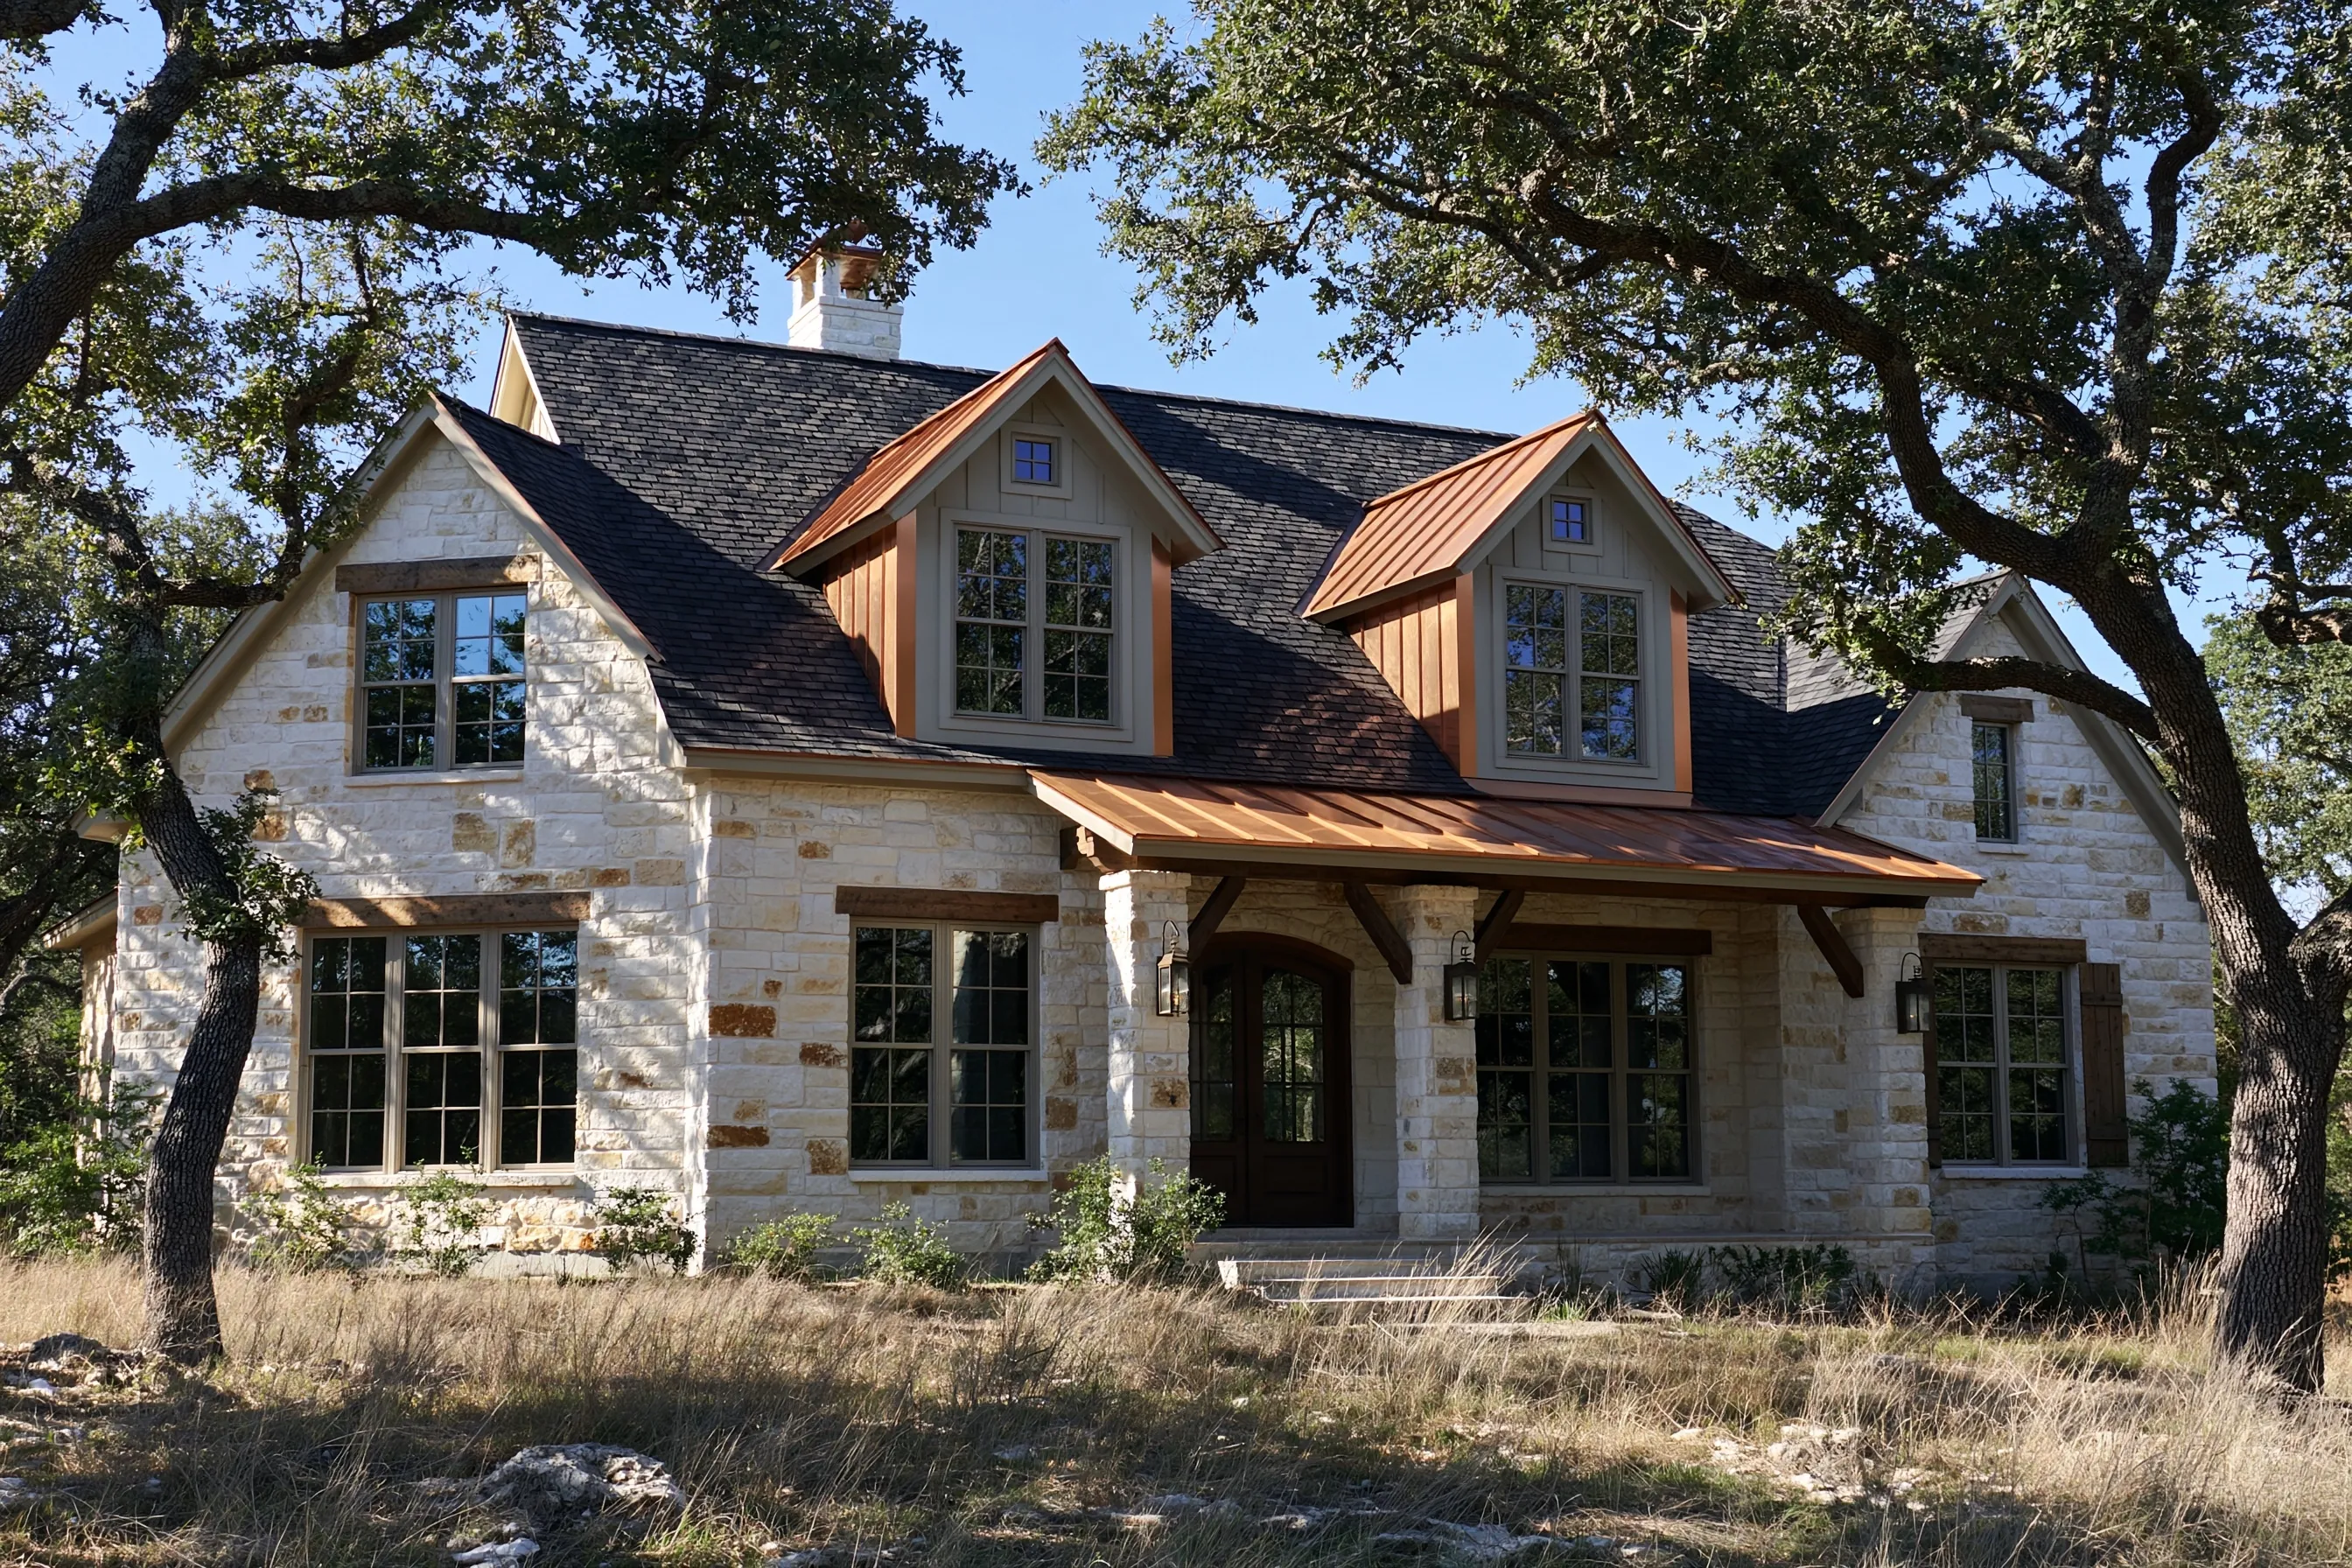
Two gabled dormers with copper roofs and copper-clad sides on the shingle roof of a two-story limestone house, with a copper porch roof below
Home
2000s two-story limestone house in Round Rock, with a copper porch roof and copper-clad dormer sides
Original request
Copper on the two front dormer roofs in place of shingles, to match the porch
Dormers
Two small gabled dormers, about 25 sq ft of roof each
Copper
16 oz copper standing seam, with copper flashing where each dormer meets the main roof
Main roof
Shingles kept; the porch roof and dormer sides are already copper
Cost
$2,400

Scope of work

We take the shingles off both dormer roofs and check the decking. Then we lay underlayment, fit copper standing seam panels and copper step flashing along each side where the dormer meets the main roof, and add edge trim. We put the main roof shingles around each dormer back.

Project overview

In this example, the owners of a 2000s two-story limestone house in Round Rock already have a copper roof over the front porch and copper on the sides of the two front dormers. The dormer roofs are still shingled, and they want them to match. The main roof has shingles in good shape, so only the two dormer roofs change.

Each dormer roof is small, but it has a ridge, two edges and a joint with the main roof on each side. Most of the care goes into those joints, where the copper flashing tucks under the main roof shingles.

The goal

Two copper dormer roofs that match the porch and stay dry where they meet the main roof.

Process

  1. Survey Dormer roofs measured and the decking checked from the attic.
  2. Shop work Panels and flashing bent to fit each dormer.
  3. On the roof Shingles off the dormers, underlayment on, copper panels and flashing fitted.
  4. Handover Main roof shingles around each dormer put back and the gutters cleared.

Planning right

  • Copper starts bright and darkens. The color change is not a defect.
  • Small roofs leak at their joints, so the flashing matters most.
  • Copper should not touch steel or aluminum parts.
  • We check the decking from the attic before the copper is ordered.

Get a free quoteMore about bay window and dormer copper roofs
Gabled entry porch roof changed to copper

Example project

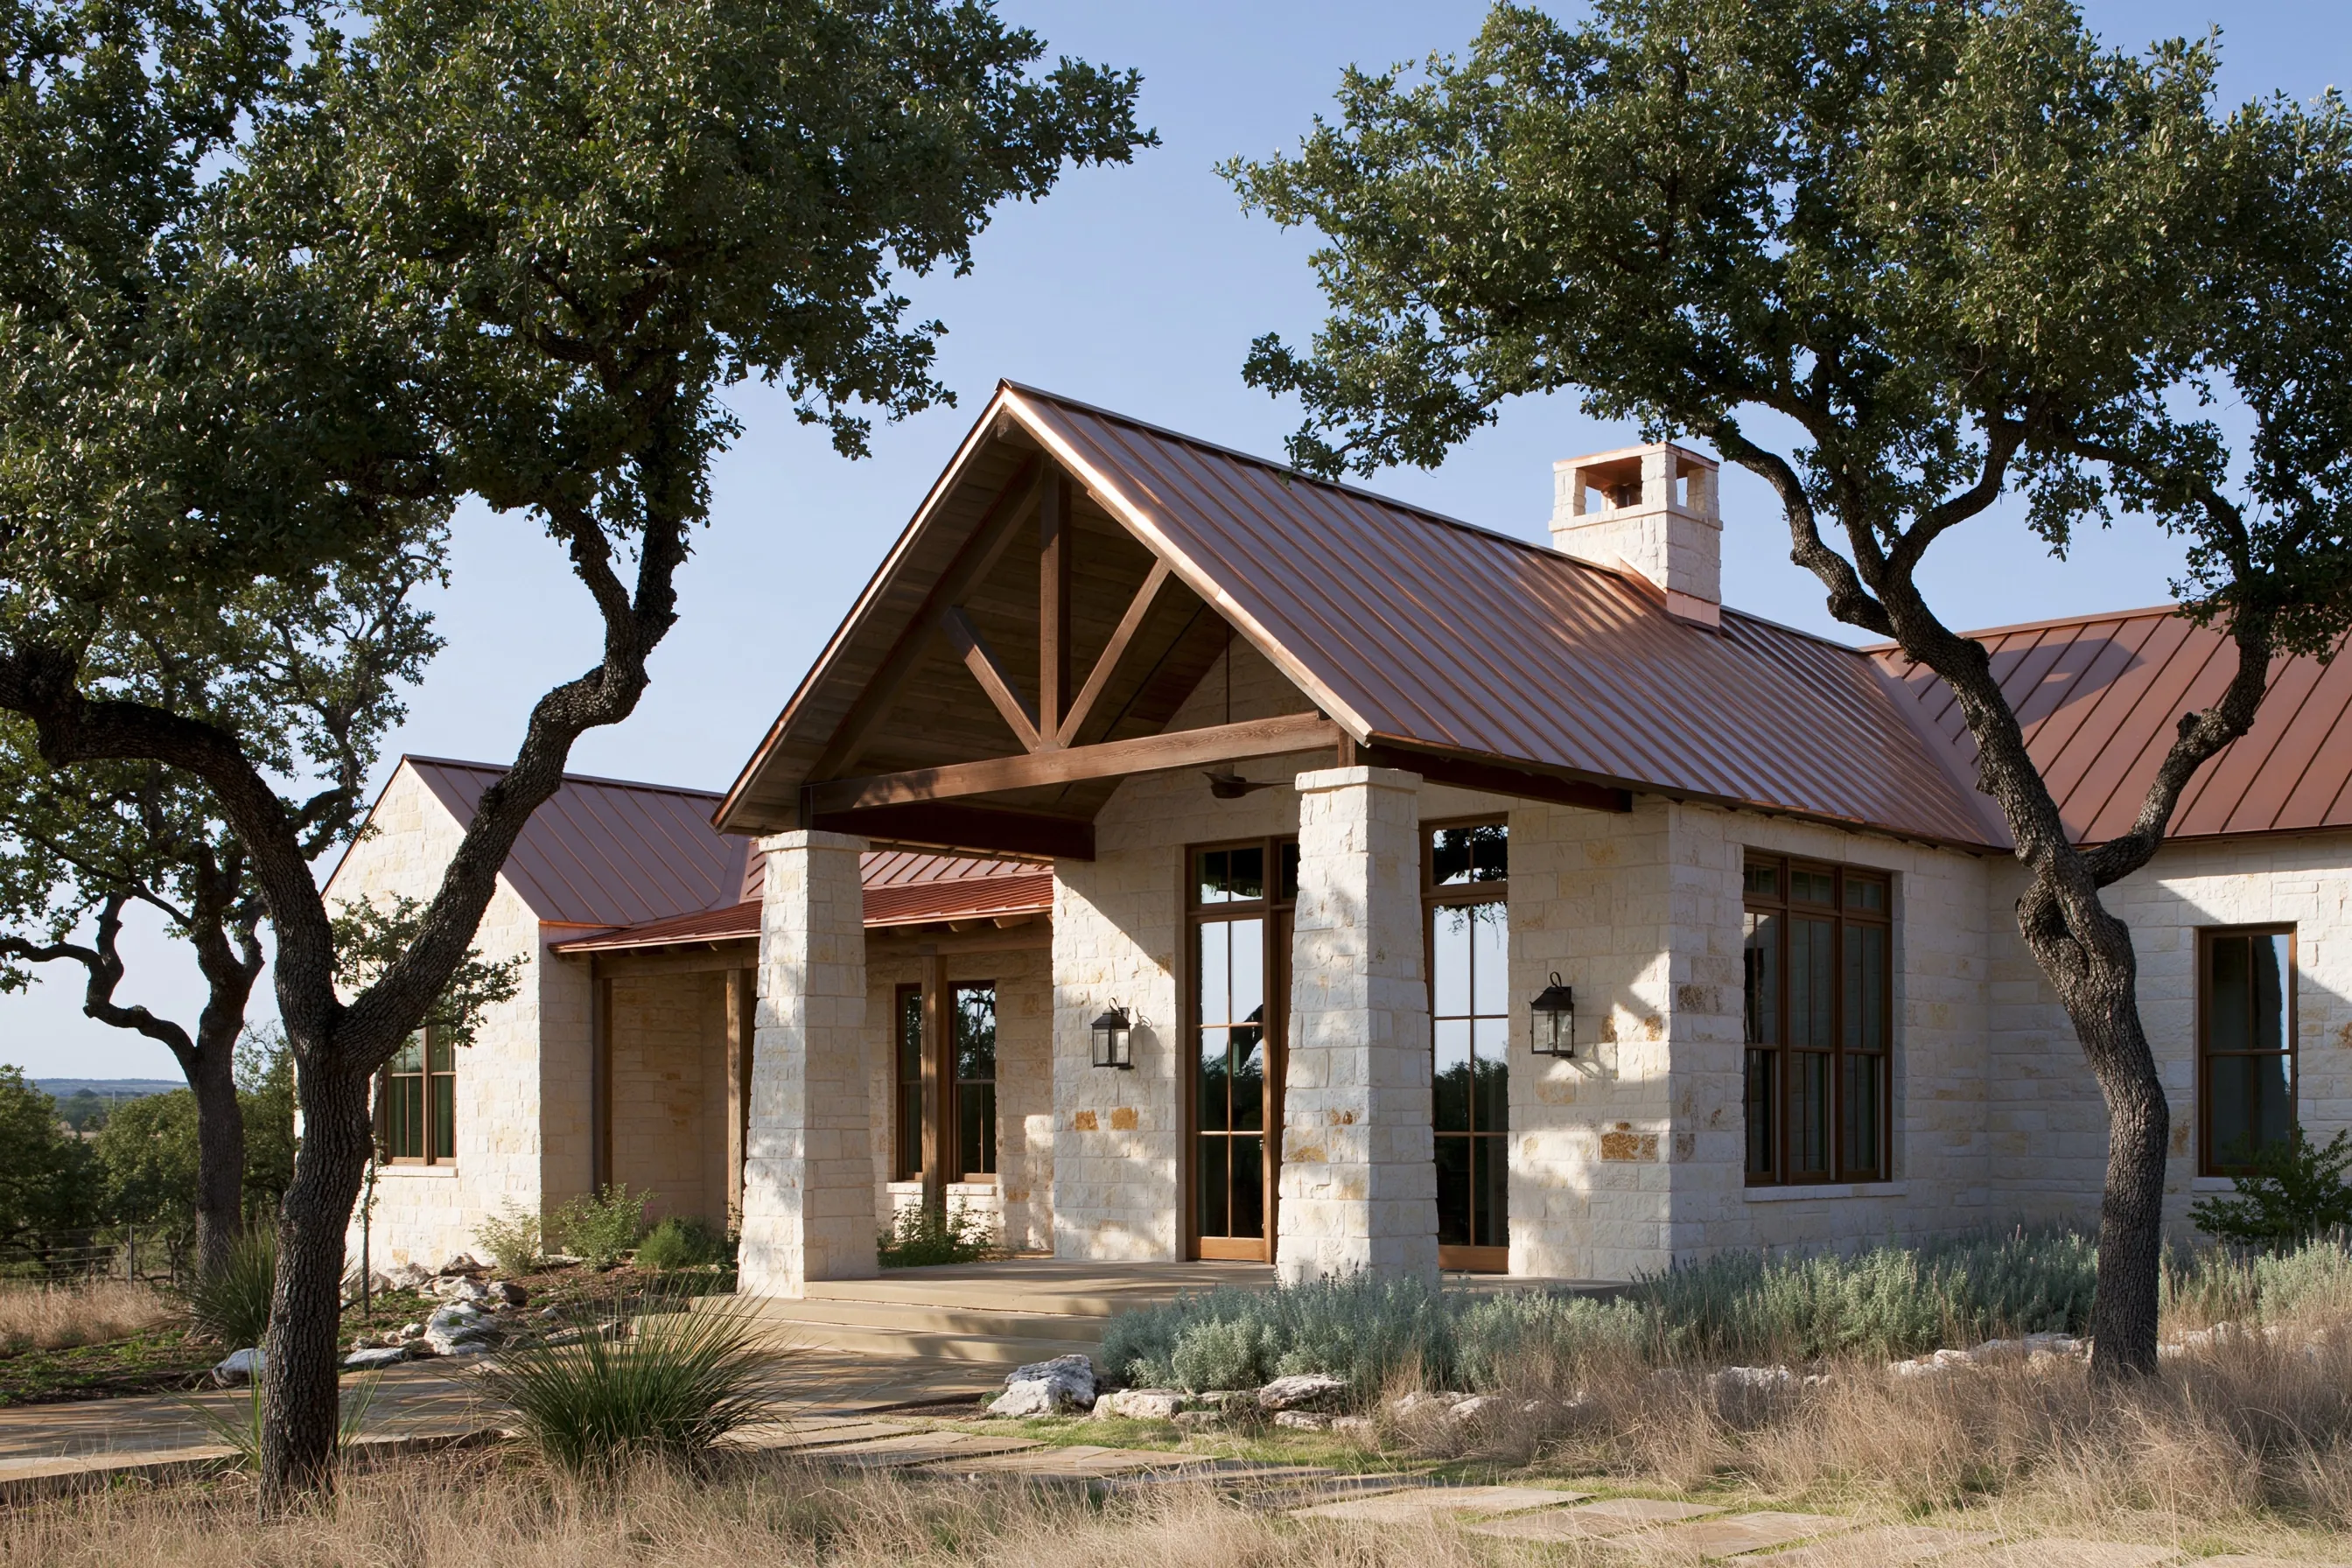
Gabled entry porch with an open timber truss and a copper standing seam roof on limestone piers, joining the copper roof of a single-story limestone house
Home
2000s single-story limestone house in Cedar Park with a copper standing seam main roof
Original request
Copper on the gabled porch roof over the front door, the one part of the roof still in shingles
Porch
Gabled porch with an open timber truss on limestone piers, about 110 sq ft of roof
Work
Shingles off, underlayment, copper standing seam and copper valleys where it joins the main roof
Kept
The porch framing, timber truss and ceiling
Cost
$4,200

Scope of work

We strip the old porch shingles and look over the decking. Then we lay underlayment, fit copper standing seam panels and copper valleys where the porch roof joins the main roof, lift and refasten the main roof panels along each valley, and add edge trim. The porch framing, truss and ceiling stay as they are.

Project overview

In this example, the owners of a 2000s single-story limestone house in Cedar Park have a copper main roof, but the gabled roof over the front porch is still in shingles. They want it in copper to match. The framing is sound, so only the roof covering changes.

Because the porch keeps its shape and framing, this is a covering job, not a new structure, and we describe it to the city that way before starting. The careful part is the two valleys where the porch roof joins the main roof. The copper valleys tuck under the main roof panels, so water runs down the valley and not under the seams.

The goal

A copper porch roof that matches the main roof and sheds water cleanly at the valleys.

Process

  1. Survey Porch roof measured and the decking checked.
  2. Shop work Panels formed to length, valley pans and trim bent.
  3. On the roof Shingles off, underlayment on, valleys set under the main roof panels, porch panels fitted.
  4. Handover Valleys and edges checked, the porch swept and the paving rinsed.

Planning right

  • We describe the job to the city in full and ask whether it needs a permit.
  • Valleys are where a porch roof most often leaks into a main roof.
  • Copper to copper at the valleys means no mixed metals.
  • Plan where the runoff lands so it does not stain the limestone piers or the paving.

Get a free quoteMore about porch and entry copper roofs

Leaking arched dormer roofed in soldered flat seam copper

Example project

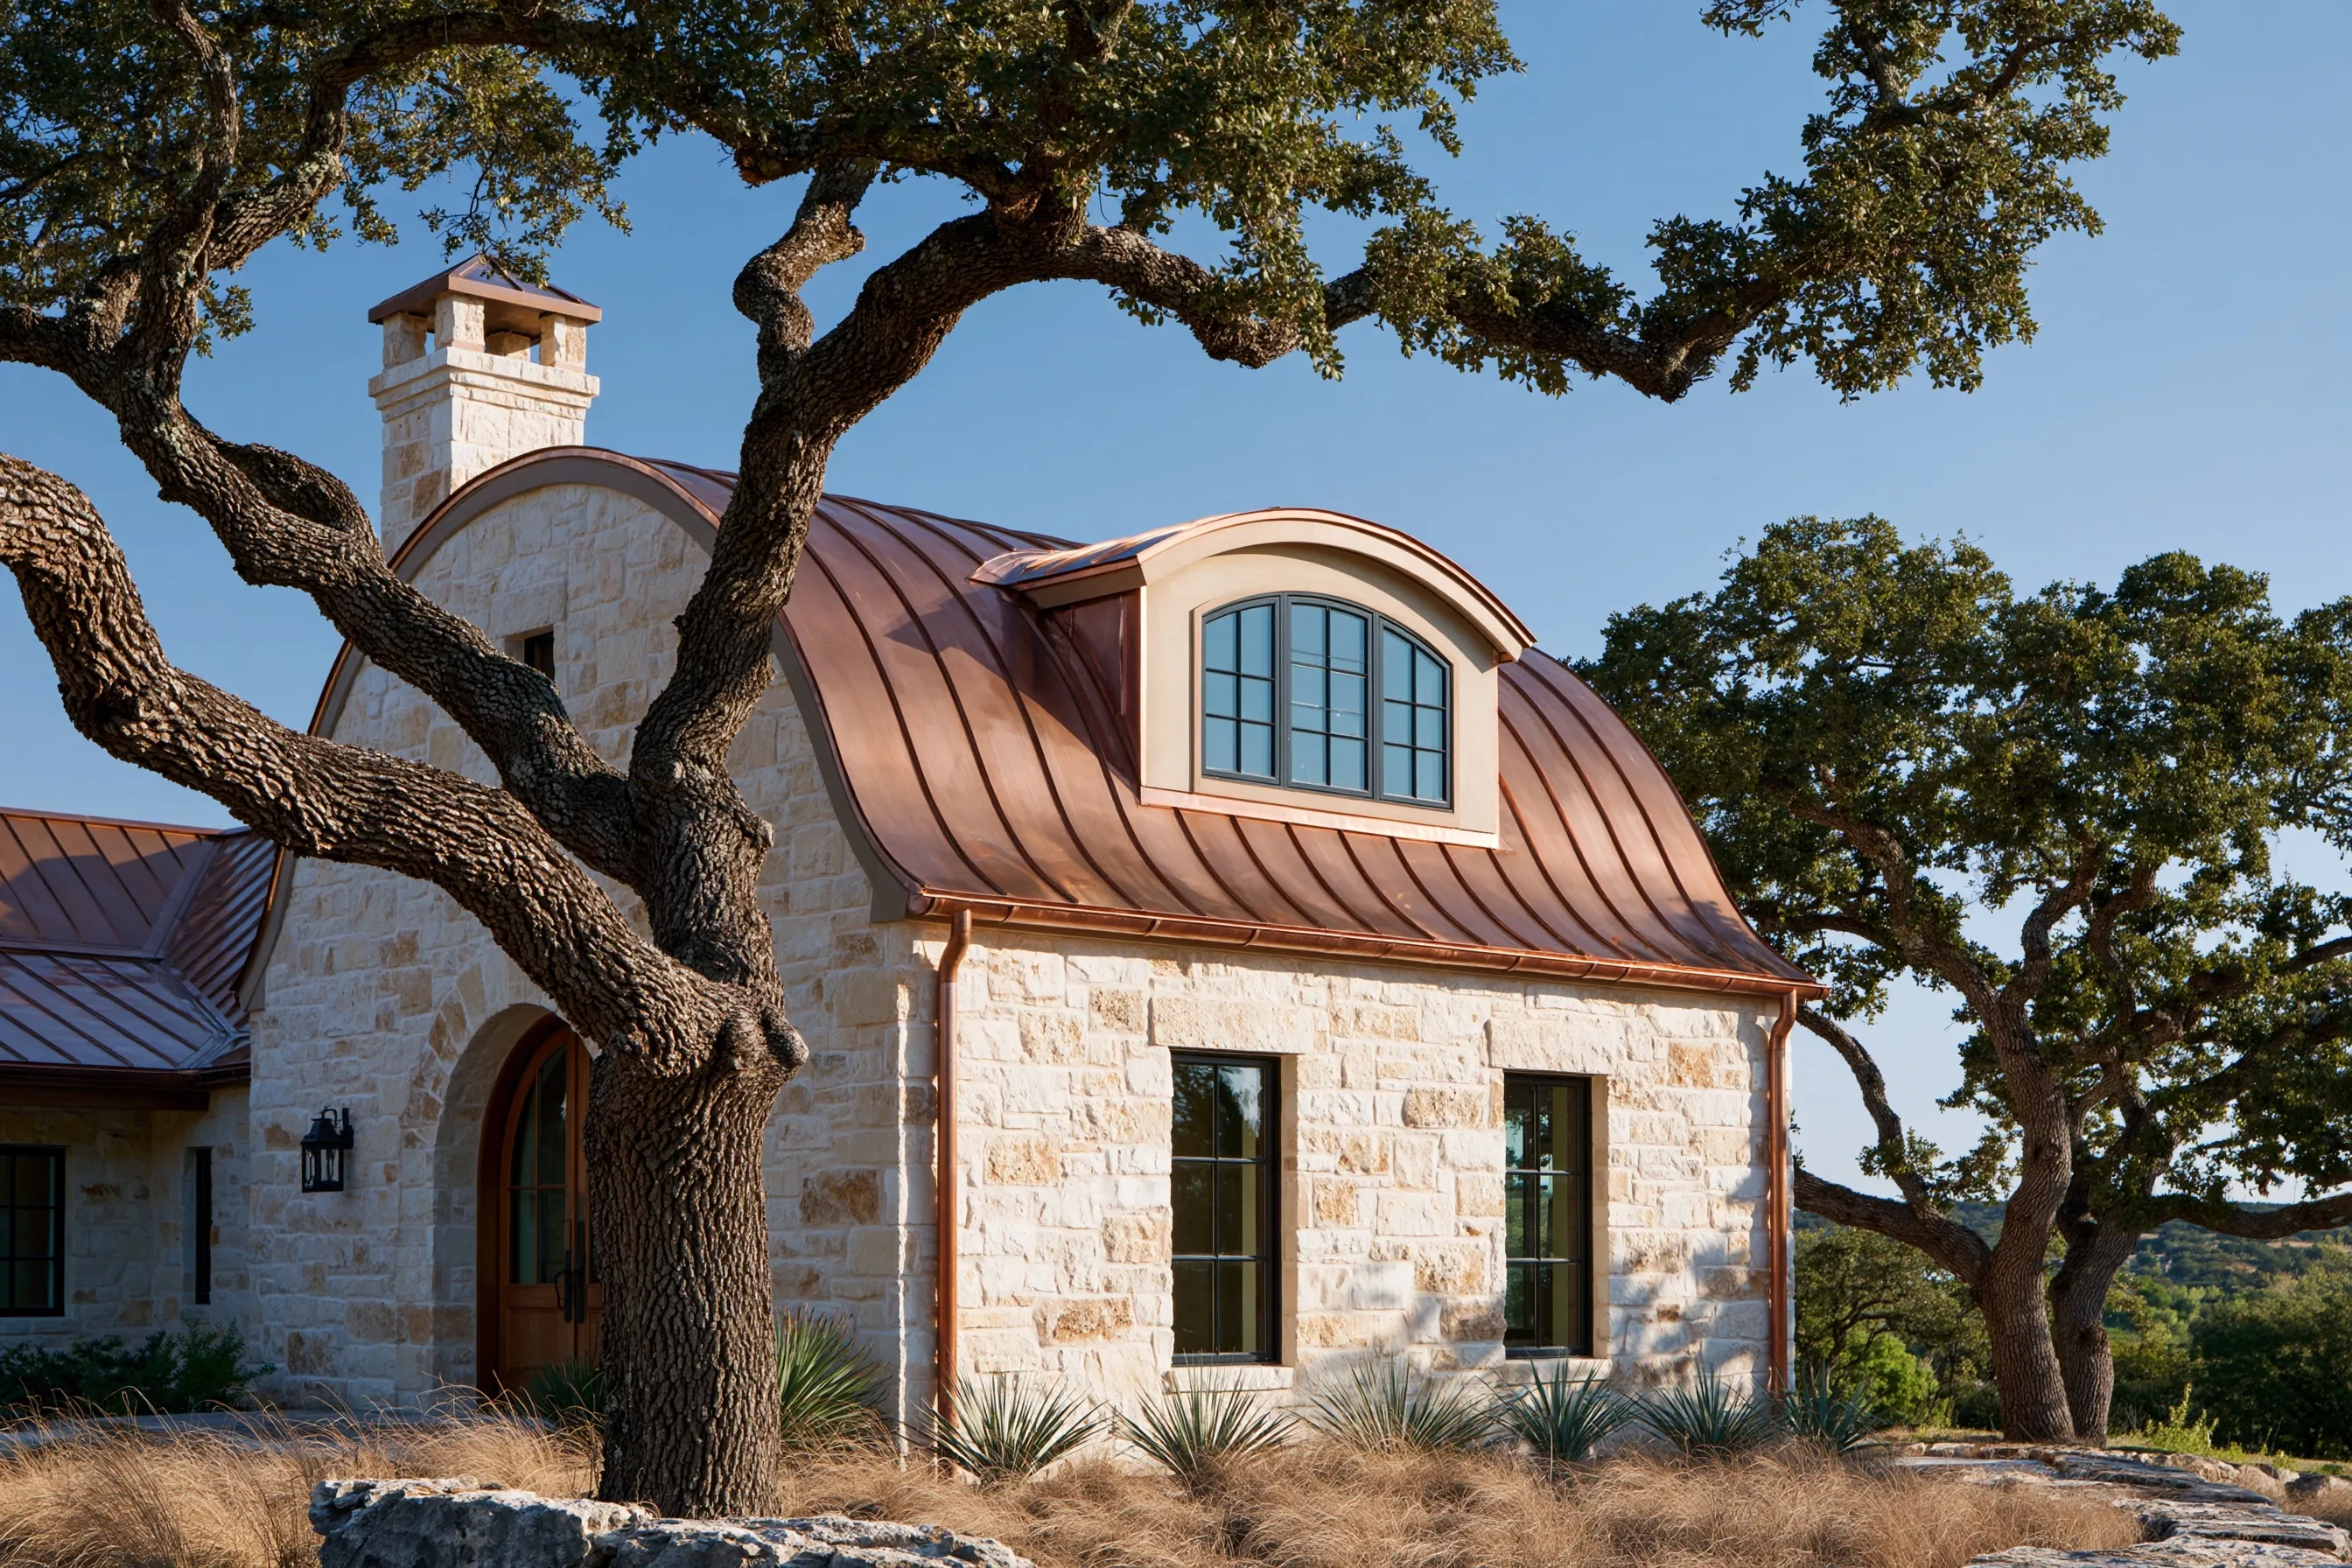
Dormer with an arched window and a curved copper roof, set in the curved standing seam copper roof of a limestone house
Home
2010s limestone house in Georgetown with a curved standing seam copper roof
Original request
Stop the leaks at the arched dormer in the curved roof
Dormer
Dormer with an arched window and a curved top, about 45 sq ft of roof and sides
Copper
Flat seam copper pans on the dormer, shaped to the curve and soldered
Main roof
Standing seam copper panels around the dormer lifted and refastened over new flashing
Cost
$4,600

Scope of work

We template the curve on site, strip the old covering from the dormer, replace soft decking, lay underlayment, then form flat seam copper pans to the template and solder them in place. New copper flashing goes in where the dormer meets the main roof, with the standing seam panels around it lifted and refastened. We finish with a water test.

Project overview

In this example, the owners of a 2010s limestone house in Georgetown have a curved standing seam copper roof with one dormer in it, over an arched window. The main roof is sound, but the small curved roof on the dormer has leaked twice, and the flashing around it was sealed with caulk.

Flat seam copper is made of small pans with folded and soldered seams, so it follows a tight curve that long panels cannot. We template the dormer, form the pans in the shop and solder them on the roof. The main roof panels around the dormer are lifted, new flashing goes under them, and they are fastened back.

The goal

A dormer roof that follows its curve, matches the copper around it and stops leaking.

Process

  1. Survey Curve templated and the decking checked where it leaked.
  2. Shop work Pans, edge pieces and flashing formed to the template.
  3. On the roof Old covering stripped from the dormer, then underlayment, the pans soldered in place and the flashing set.
  4. Handover Main roof panels refastened around the dormer and a hose test run.

Planning right

  • We check whether the address is in a Georgetown historic overlay before any roof work that changes how it looks.
  • Soldered seams suit tight curves where long panels will not bend.
  • Replace soft decking under the leak before any copper goes on.
  • Copper turns darker over time, at no set pace.

Get a free quoteMore about curved and flat seam copper

Nearly flat back porch roof in soldered copper

Example project

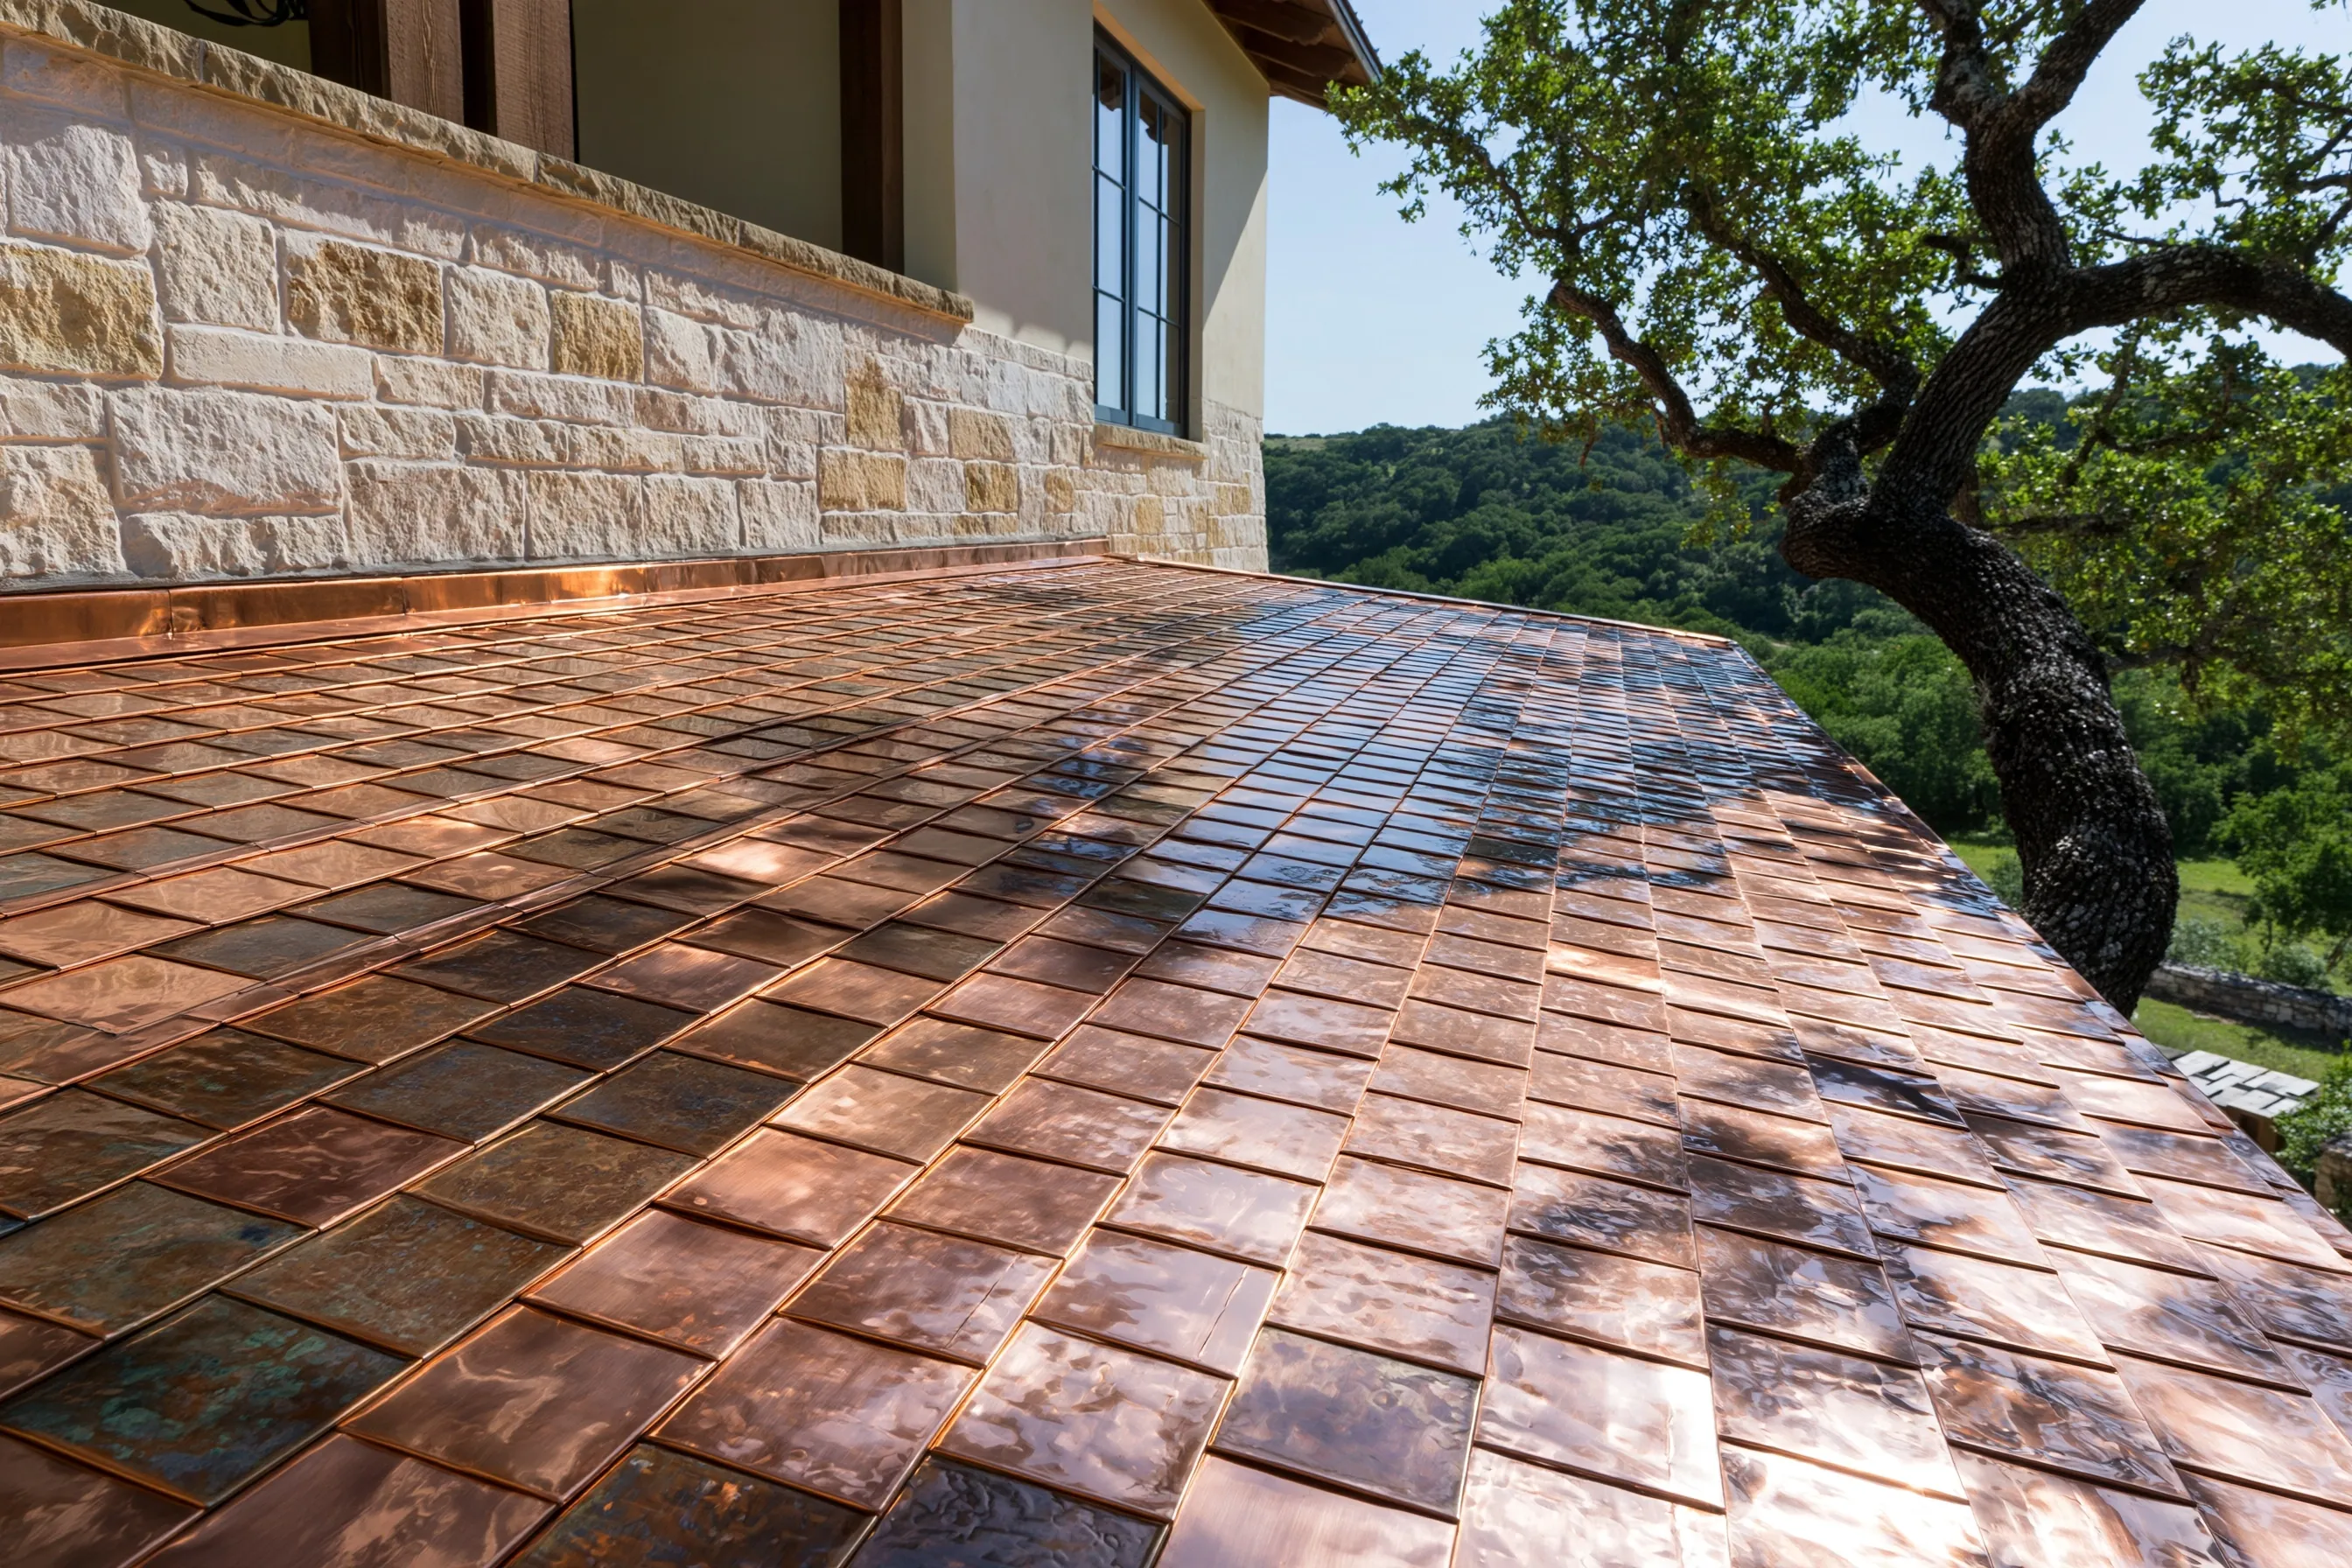
Low-slope roof of small soldered flat seam copper pans laid in staggered rows, with copper flashing along a limestone wall
Home
2010s two-story house in Cedar Park with a limestone lower wall, on a slope above a wooded valley
Original request
Replace the leaking rolled roofing on the low roof over the back porch
Porch roof
Nearly flat roof over a long back porch, about 360 sq ft
Copper
Flat seam copper pans with soldered seams, and copper flashing up the stone wall
Gutter
Old aluminum gutter replaced with copper, priced separately
Cost
$15,100

Scope of work

We take off the rolled roofing and check the decking. Then we lay underlayment, set and solder the flat seam copper pans, turn copper flashing up the stone wall with counter flashing set into a joint cut in the stone, and fit a drip edge. The new copper gutter is a separate item.

Project overview

In this example, the owners of a 2010s two-story house in Cedar Park have a low, nearly flat roof over the back porch, set against the limestone wall of the house. Its rolled roofing has blistered, and it leaks where it meets the stone.

Water can sit for a while on a roof this flat, so the pans are joined with soldered seams. The old aluminum gutter would wear away under copper runoff, so the owners replace it with a copper one at the same time.

The goal

A dry back porch, under a roof that copes with standing water.

Process

  1. Survey Fall of the roof measured and the soft spots in the decking found.
  2. Shop work Pans cut and their edges folded ready for soldering.
  3. On the roof Blistered roofing stripped, new underlayment, pans laid and their seams soldered, flashing turned up the stone.
  4. Handover Copper gutter hung and the seams checked with water.

Planning right

  • On a nearly flat roof, we solder the seams.
  • Copper and aluminum should not share a drainage path.
  • If water stands in one spot, fix the slope under the copper.
  • Counter flashing set into the stone lasts longer than flashing stuck on with caulk.

Get a free quoteMore about curved and flat seam copper

Shingle roof replaced with standing seam copper

Example project

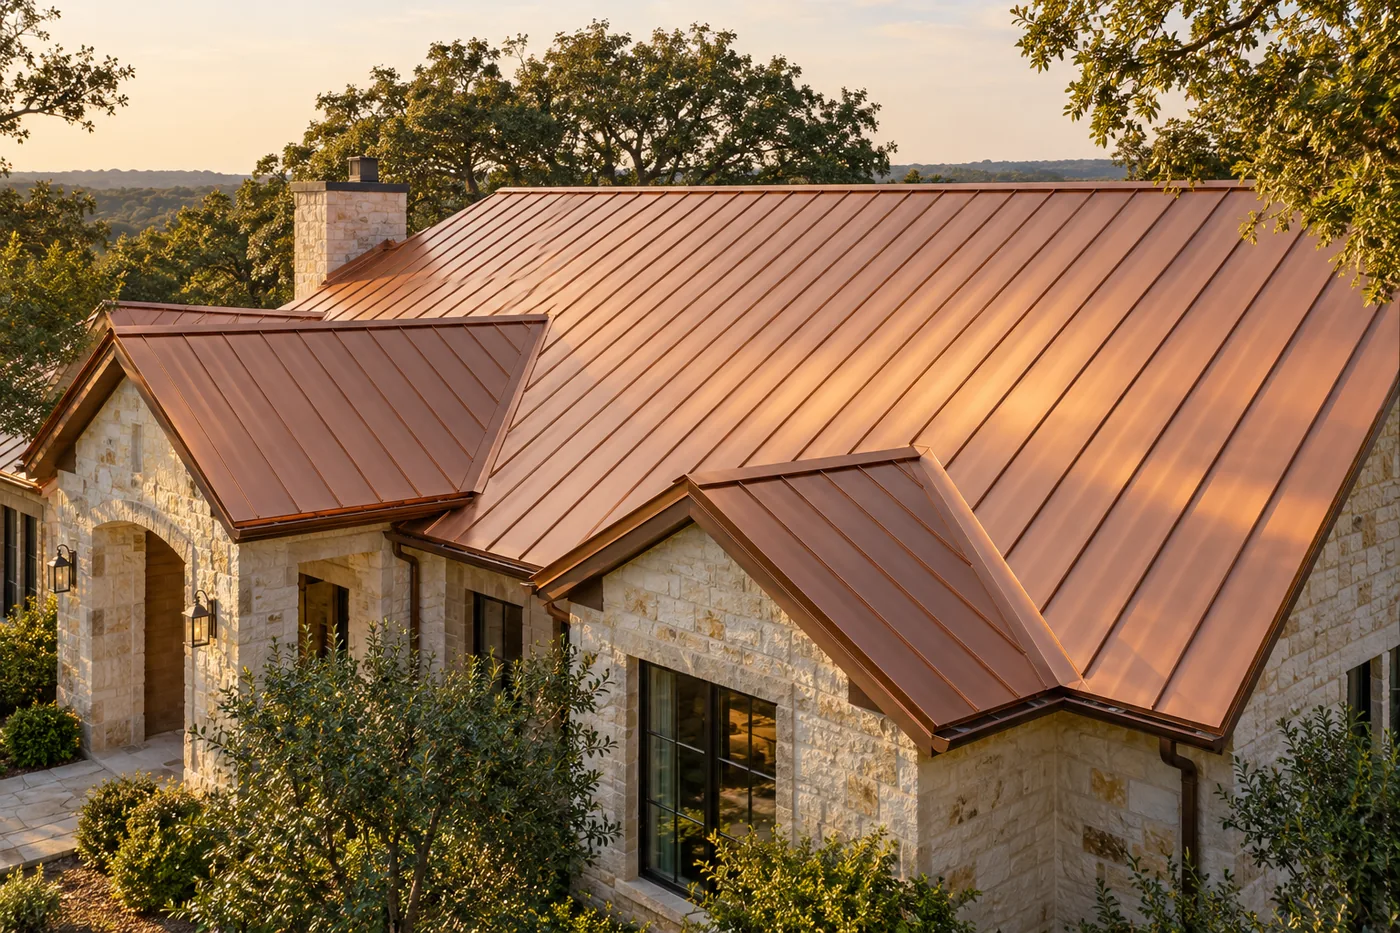
Hip and gable roof in bright standing seam copper on a limestone house with a stone chimney
Home
1990s limestone house in Round Rock
Original request
Copper instead of another set of shingles
Roof
Hip and gable roof, about 1,800 sq ft, with a stone chimney
Copper
16 oz copper standing seam on clips, with copper flashing and trim
Decking
Checked after tear-off; rotten boards priced on top
Cost
$63,000

Scope of work

We strip the shingles one section at a time, then check and repair the decking, lay underlayment and fit 16 oz copper standing seam panels on clips. Every valley, hip, wall and the chimney gets copper flashing, then edge trim, and we sweep the yard for nails.

Project overview

In this example, the owners of a 1990s limestone house in Round Rock need a new roof and want copper instead of another set of shingles. The roof has hips, several gables and a stone chimney.

Copper moves with heat, so the panels are fixed with clips that let them slide. Each section is stripped, checked and covered with underlayment before the end of the day. Every joint is flashed in copper, so no other metal touches it.

The goal

A whole copper roof, with every valley, hip and the chimney flashed in copper.

Process

  1. Survey Roof measured, attic checked for soft decking and the panel layout drawn.
  2. Shop work Panels run to length, trim and flashing bent.
  3. On the roof Shingles off one section at a time, decking repaired, underlayment on, panels clipped and seamed.
  4. Handover Chimney and valley flashing checked, gutters cleared and the yard swept for nails.

Planning right

  • We say how rotten decking is priced before the tear-off.
  • Clips that let the panels move keep the seams tight in summer heat.
  • Plan gutters and drips so copper runoff stays off pale stone.
  • Keep spare panels and trim from the same order for later repairs.

Get a free quoteMore about standing seam copper roofs

New copper flashing where a porch roof meets a stone chimney

Example project

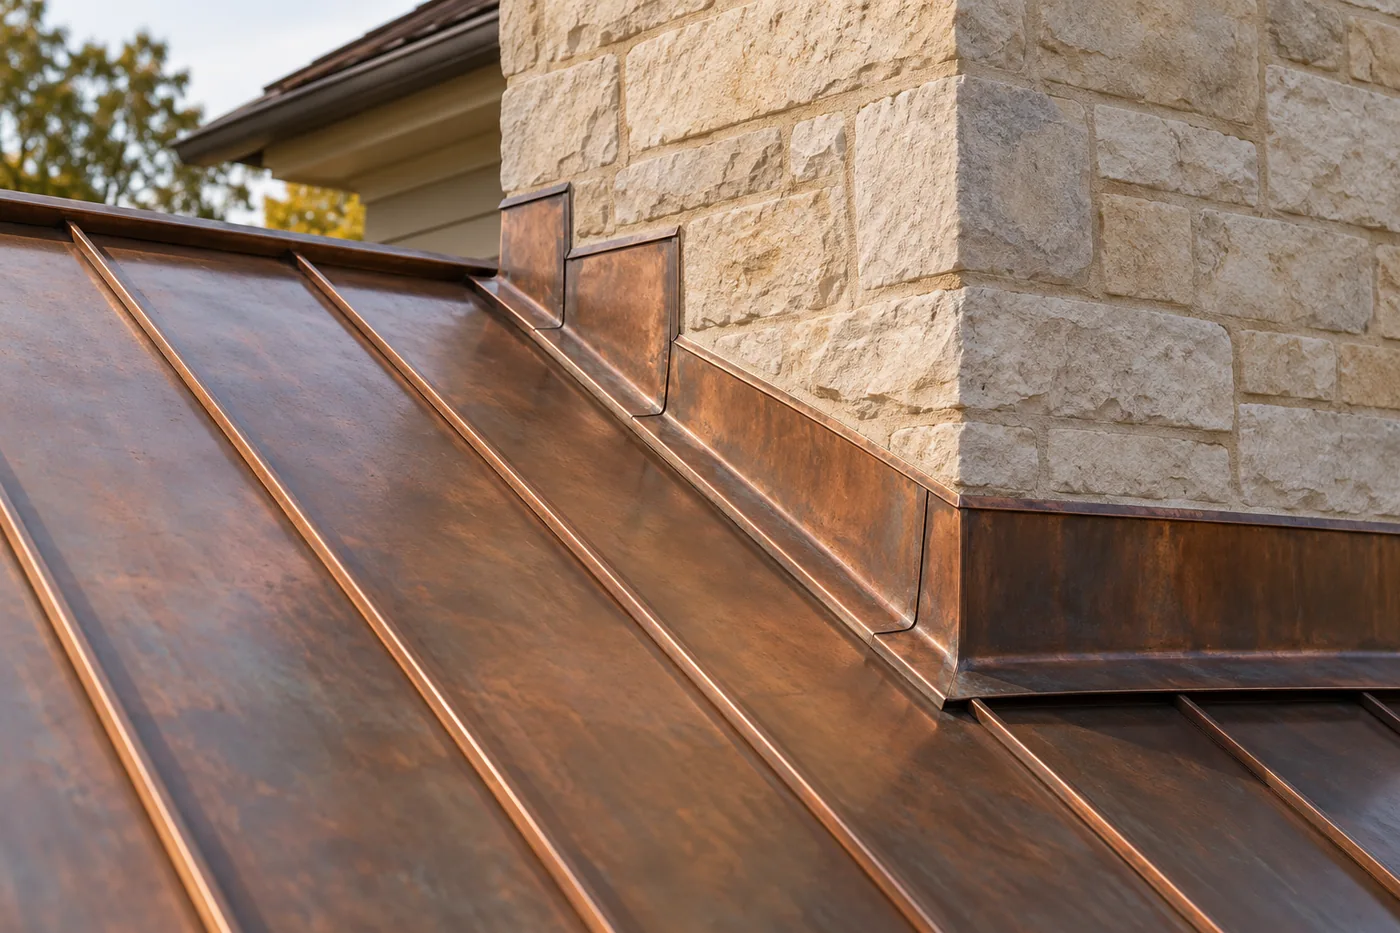
Copper standing seam roof meeting a limestone chimney, with copper step and counter flashing along the joint
Home
2010s house in Hutto with a copper roof over the back porch
Original request
Stop the leak on the porch ceiling below the chimney
Cause
Old flashing stuck to the stone with caulk that has cracked
Work
New copper step flashing and counter flashing set into a joint cut in the stone
Kept
The copper roof panels
Cost
$1,800

Scope of work

We trace the leak with a water test. Then we lift the panels beside the chimney, take out the old flashing, fit new copper step flashing, set counter flashing into a joint cut in the stone, refasten the panels and run a second water test. Any repair to the stone itself is extra.

Project overview

In this example, the owners of a 2010s house in Hutto have a copper roof over the back porch that runs into a limestone chimney. After hard rain, water shows on the porch ceiling right below the chimney.

The panels are fine. The old flashing was sealed to the face of the stone with caulk, and the caulk has cracked. New counter flashing goes into a joint cut in the stone, so the seal no longer depends on caulk.

The goal

A dry porch ceiling, with flashing built into the stone instead of stuck to it.

Process

  1. Survey Leak traced with a water test and the old flashing looked at.
  2. Shop work Step and counter flashing bent to the chimney’s sizes.
  3. On the roof Panels by the chimney lifted, old flashing out, new flashing in, counter flashing set into the cut.
  4. Handover Panels refastened and a second water test run.

Planning right

  • We find the leak before replacing anything.
  • Flashing set into the stone outlasts flashing stuck on with caulk.
  • Reuse sound copper panels where you can.
  • A leak near a chimney can also come through the stone itself, which is a separate repair.

Get a free quoteMore about copper flashing

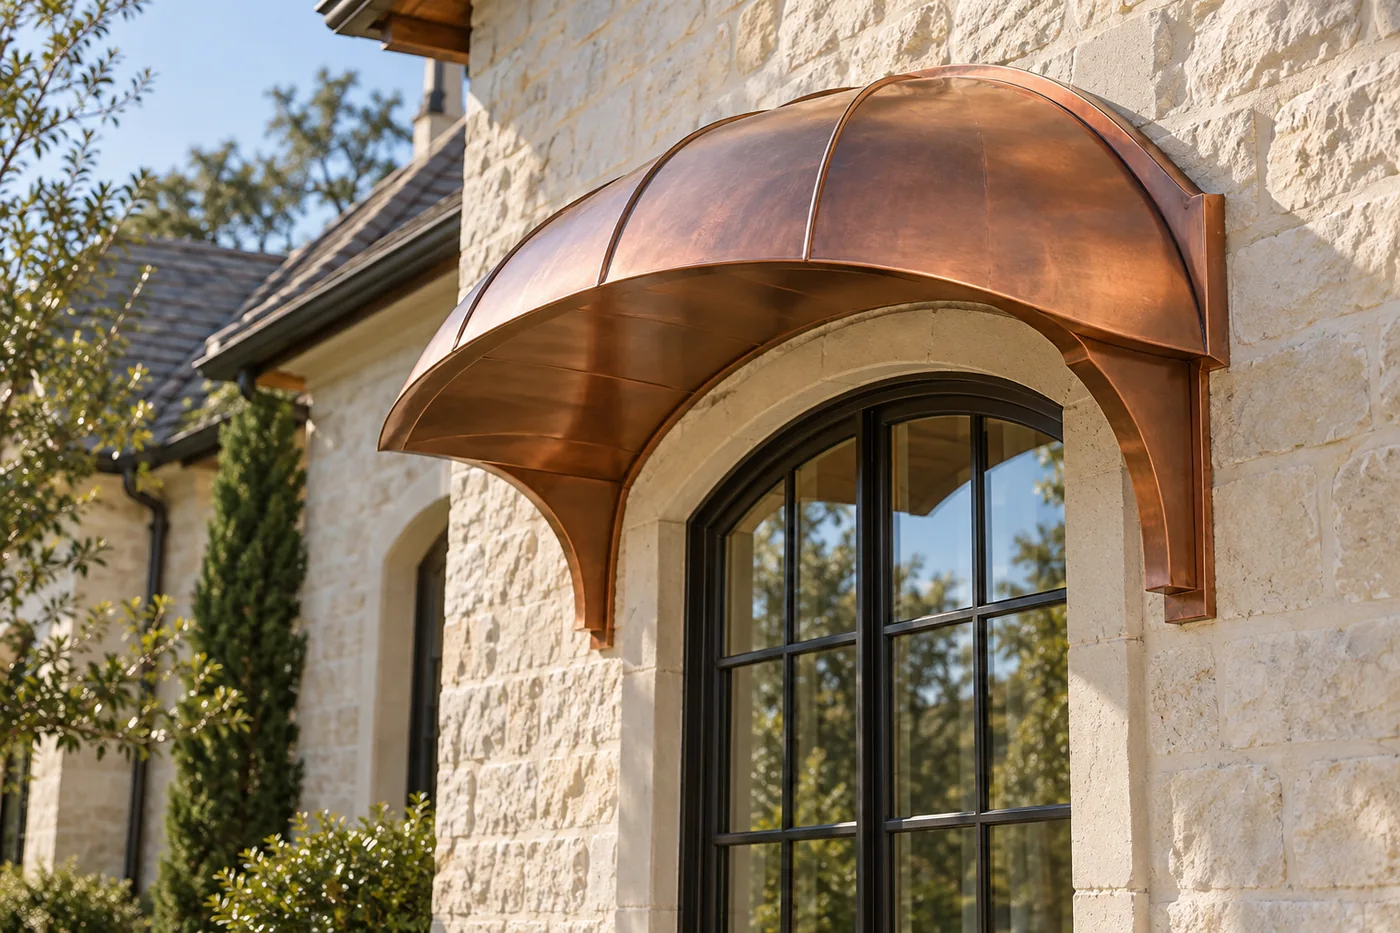
Curved copper hood over an arched window

Example project

Curved ribbed copper hood on two copper brackets over a tall arched window in a limestone wall
Home
2000s limestone house in Round Rock
Original request
Shade and rain cover over the tall arched window on the west side
Hood
Curved, ribbed copper hood about 6 ft wide, about 30 sq ft of copper, with soldered seams
Support
Two copper-clad brackets anchored through the stone into the wall framing
Cost
$3,900

Scope of work

We measure the arch and find the framing behind the stone. In the shop we build a curved hood with a stiff frame inside and soldered copper over it. On site we anchor two brackets into the framing, fit flashing along the top edge and a drip at the front edge, and seal every anchor hole.

Project overview

In this example, the owners of a 2000s limestone house in Round Rock want shade and rain cover over a tall arched window on the west side. They want something that looks made for the arch.

We build the hood in the shop as a curved copper shell over a stiff frame, sized to the arch. It hangs on two brackets anchored through the stone into the wall framing, with flashing along the top edge and a drip at the front so water falls clear of the window.

The goal

A copper hood shaped to the arch, fixed firmly and shedding rain clear of the window.

Process

  1. Survey Arch measured and the framing behind the stone found.
  2. Shop work Frame built, copper formed over it and the seams soldered.
  3. On site Brackets anchored, the hood hung and the top flashing fitted.
  4. Handover Anchor holes sealed and the stone below wiped clean.

Planning right

  • We fix brackets into the framing, not only into the stone.
  • A drip at the front edge keeps water off the window.
  • We seal every anchor hole so water cannot get into the wall.
  • A hood on a west wall also cuts the afternoon sun on the glass.

Get a free quoteMore about curved and flat seam copper

Request a free copper roofing quote

Tell us which roof or part of the roof you have in mind, roughly how big it is, what covers it now, any leaks and the address. Photos help. We'll get back to you soon to arrange a visit or with any questions we have. Estimates are free and there's no obligation.

Call (737) 237-8228